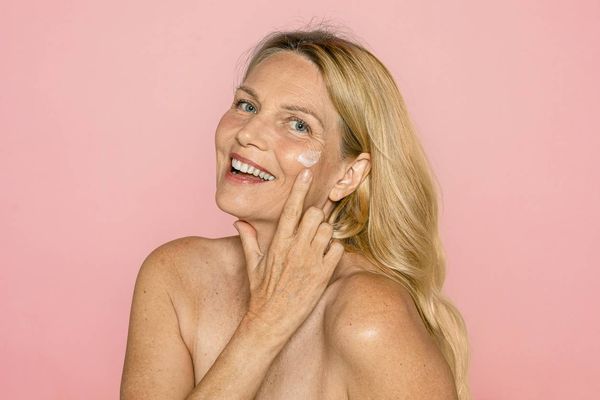

I don't know about you, but when I see photos of beauty product models, my first subconscious reaction goes something like this: Oh, she's so beautiful. Why can't I look like that? I want to look like that! I wish I had her smooth skin/lustrous hair/perfect teeth/gorgeous smile.
And chances are I'll buy what she's advertising.
Ah, the power of airbrushing—an easy road to utter perfection.
But that begs the answer to some really important questions: Is this perfection realistic? Is it attainable? Is it distorting the image of what real women look like?
Or is its only success making us all feel #less-than?
I was happy to learn that CVS recently made an important decision in support of women. CVS announced that, beginning in April, it would "no longer change or enhance a person's size, shape, proportion, skin or eye color, wrinkles or any other individual characteristics in imagery created for their stores, websites, social media and marketing materials." On its brands, it will use a watermark on images that haven't been "materially altered" so we will know which depict women as-is, rather than ones that send us closer and closer to insecurity.
I think airbrushing is still OK—but let me explain. I'm referring to airbrushing of a different type—the kind you can do yourself, at home, when you're applying your own makeup.
That is low-tech and honest. It's simply the art of makeup.
Through the years, I've interviewed experts and done my due diligence reading about certain techniques for enhancing what you have with simple makeup techniques. Putting on makeup should not be about hiding your age, but rather enhancing what you have.
But all the steps can be so daunting and time-consuming. Here's my attempt to make it easier than you think.
1. Good makeup starts with good skin care.
As we age, skin care needs to change. In our 40s, estrogen levels start to decline and skin typically becomes drier (although sometimes, because of those hormonal fluctuations, you might sprout acne). Things like fine lines, blotchiness and dark spots begin their ascent. Once we get into your 50s and 60s, they continue to progress, and we may need to add to or change our arsenal.
Basic skin care should include a good cleanser that fits your skin type (dry, combination or oily), UV protection (at least an SPF of 15 every single day, even when it's cloudy), a moisturizer if your skin is dry and an eye cream.
If your skin is especially dry or sun-damaged, you might want to add a serum or oil as an extra step in your routine, especially at night when it has time to penetrate as you sleep.
2. Match your face makeup to your skin tone.
There are many choices available to even out your skin tone, and your product doesn't need to be a heavy liquid foundation. Tinted moisturizers, BB creams, mineral makeup, powdered or stick foundations work well, too. And rather than wear it all over your face, you can just apply it to the blotchy areas that need to be evened out (known as spot-concealing). Opinions vary on whether to use a sponge, brush or fingers to apply; I say to use whatever you're most comfortable with. Some people are absolute klutzes when it comes to tools and work better using their own fingers.
In her book, Beauty from the Inside Out, Bobbi Brown offers this tip to find the right color: Pick three shades that come close to your skin tone, and try them on a makeup-free face. Apply them in two strips on your cheek and check the colors in natural light; go with the color that blends with your skin.
3. Use under eye concealer.
Most of us need this, whether it be for puffiness, dark circles, blue veins that show up through light or thin skin (my personal problem) or something else. Applied right, concealer can give your eyes a lift and brighten them. The color should be one shade lighter than your skin tone, advises Brown. A creamy formula will be easier to blend into your skin than one in a stick (those formulations tend to be drier).
Use your fingers to apply concealer, then tap it gently into your skin, using your ring finger, which will exert the least pressure. (The under-eye skin is very delicate and you don't want to pull it.)
4. Apply powder (unless you shouldn't).
Another step? Yes, because it adds a finishing touch to set face makeup and help it last longer. If your skin is oily, it can also help cut the shine. Use just a dusting of pressed or loose powder for the best effect. If you have dry skin, avoid it because it will call attention to those dry areas.
5. Brighten with blush or bronzer.
We all need some brightening up, especially in the winter when we tend to spend more time indoors if we're in a cold climate. Some people love bronzer for its ability to give them a tan, "I've-been-outdoors" look; others achieve a similar effect with blush. Applying a powder, cream or gel to the apples of your cheeks can help make your cheeks appear fuller (sadly, they start to de-plump and sag with age) and more youthful; if you're after a slimmer face, apply blush to the upper portion of the apples of your cheeks and sweep it slightly upward, around your temples. I've never felt comfortable with the whole contouring craze, but if you're up for it, you can choose a darker tone to sculpt your face in areas where shadows are naturally found, like under your cheekbones, jawline and around your forehead.
6. Let your eyes shine.
Here's where things can get mighty complicated—or not. Personally, I swipe on some mascara and go (unless I'm attending a formal event; then I attempt to get a bit more colorful). Sometimes, but not often, I'll use a smudge of a dark-ish color in my crease.
Using a curling tool helps define and elongate your eyelashes if they stick straight out (like mine do), but always use it before you apply mascara, or else your eyelashes can break. Mascaras come in many forms—lengthening, waterproof, thickening and volumizing. I usually stay away from waterproof, because it can be tough to remove (but I will definitely be wearing it if I plan on crying, like at my son's upcoming wedding in June).
If you like lining your eyes, pencil liners are easy for precise lines; gel liners give a more intense, crisp line. For a softer line, Brown advises working with powders. There are many brushes on the market to use with powdered liners to achieve different looks like smudged, soft, wings and precise. Some people also like lining their lower lids for added definition, but I gave this up years ago because I only end up with raccoon-like smudges underneath my eye (if you have a suggestion on how to avoid this, I'd love to know).
Eyeshadows in powder form are easiest to apply, but creams last longer. A light, pale color can open up your eye without calling attention to the fact that you are wearing shadow, if you like the natural look. If you love color, go ahead and experiment with different shades, which you can blend and layer to your heart's content to achieve the look you're after.
7. Love those lips.
Lips get dry as we age, and they also develop those pesky little wrinkly vertical lines that seem to attract the lipstick you're putting on to hide those same lines. (Did that make sense? I think so. More on that in a moment.) Lipstick can give your complexion a lift, make your eyes appear brighter and look "finished."
How do you choose what type of lipstick to use when there are so many kinds—gloss, matte, gel, creamy and chubby pencils? It all depends on your style, your natural lip color and your skin tone and texture. If you want to go natural, Brown says you should bite your lips and try to find a lipstick that comes close to that color. (Caution about biting too hard, though; you don't want a bruise). Allure magazine's advice is to choose a shade based on your lips' natural color and not your skin tone. Pale lips look best in cherry red or coral; naturally reddish lips with hot pink, orange or cranberry; dark lips with brick red and burgundy, they say.
Allure's advice on applying: Start at the center of your lips, then blend the color out toward the corners of your mouth. To prevent a heavy look, try swiping the lipstick on just your bottom lip, then press your lips together, using your finger to distribute the color over your mouth. When you're finished, blot with a tissue and swipe lipstick on again to add shine and coverage.
Oh, and what about those lines that pick up the color? Well, lines will be lines, and as we age, they're a fact of life. But we can try to make them less obvious. Advice is all over the place. Some experts say that it's due to dry lips, so keep them exfoliated and well moisturized. Some say you should lightly apply a lip liner (but others frown on this), then color in the lip using that same liner. One other suggestion is to apply an invisible lip liner, rather than one in a color, or to prime your lips first with a concealer to create a smooth base.
Read more about How to Get Full(er) Lips.
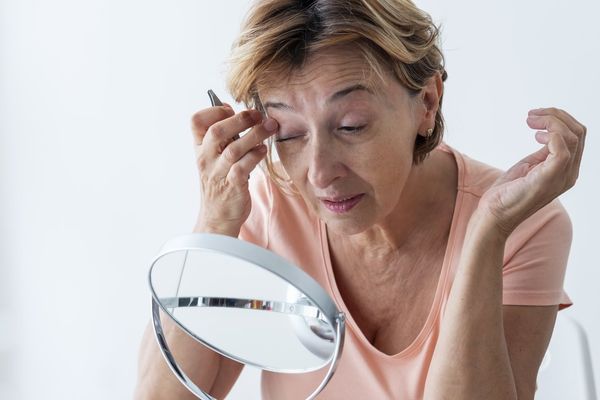
8. Don't forget the brows.
This is the final touch, which so many of us neglect, either because they're challenging, we don't know what to do, we run out of time or we're afraid of looking foolish if we paint on the "wrong" kind of brow. An eyebrow fail—that's no fun. After all, there's an art to creating something from little or nothing. And the thing is, brows tend to thin and become sparse as we age, so this can be particularly challenging
But the right shaped brow and its definition can really frame your face. My advice? Watch some YouTube videos on using an eyebrow pencil or powder or read up on how to do it. Or you can visit a salon that specializes in brow waxing and shaping and let an expert give you a quick lesson on how to "fake" a full brow.
Another option is a semi-permanent eyebrow tattoo, done with a relatively painless technique called microblading, which deposits pigment beneath the first layer of your skin. A skilled and qualified technician can create realistic-looking brow hairs using soft, quick strokes. But keep in mind that it's not cheap, and neither is it permanent—it needs to be touched up anywhere between six and 36 months.
You may also want to read:
Shaving Face: The Truth About Facial Hair
3 DIY Hairstyle Tutorials: Style Your Hair Like a Pro
Top Mistakes You're Making When Shaving Your Legs